Sunday, December 18, 2011

Chicken Chili with White Beans

I have a recipe for a green and white chicken chili that I've made and loved in the past. The problem with it is that there are some ingredients that can be hard to come by in my area. Fresh tomatillos, green or white chili powder.  The chili powder is an especially difficult get. I found this great spice store in Charleston a year or so ago, and I bought a baggie of green chili powder that was awesome, but I ran out of it long ago.

But that's okay, because I was able to churn out a great chicken chili without it. And without the tomatillos or fresh cilantro. It didn't come out as vibrant green as it usually does, but it still came out great.

Chicken Chili with White Beans

Ingredients
  • 1 lb ground chicken
  • 1 lb chicken sausage
  • 1 lb dry white kidney beans
  • 1 32 oz can Italian peeled tomatoes - drained and rinsed
  • 1 large white onion - diced
  • 4-6 stalks celery - diced
  • 2 green bell peppers - seeded and diced
  • 6 good sized jalapeno peppers - seeded and diced
  • 12 oz beer - any kind
  • 2 cups chicken broth
  • 6 oz Goya Recaito (cilanto based seasoning)
  • 2 tbsp vegetable oil
  • 1 tsp sea salt
  • 1 tsp chili powder
  • 1 tsp ground white pepper
  • 1 tsp ground cumin
  • 1/2 tsp ground cayenne pepper
 - Soak the beans overnight per instructions on the package.  You will need to cook the beans separately from the chili as they takes a while.

 - Add the ground chicken and sausage meat (removed from the casing) to a large pan.  Cook thoroughly over medium heat, using a wooden spoon or spatula to mash the meat up into small pieces and then set aside.

 - Heat the oil in a stock pot (one with a lid), then add the onion, celery, bell peppers and jalapeno peppers. Simmer for several minutes, until the onions are a bit translucent.

 - Add your tomatoes*, beer, chicken broth, salt, chili powder, cumin, white pepper, cayenne pepper and Recaito.  Bring to a boil, then add the cooked chicken and sausage. Once you bring it back to a boil, you can reduce the heat to medium-low or low, cover it and simmer for 2 hours or so. Stirring regularly.  The tomatoes and the rest of the vegetables will break down nicely in that time.

 - While your chili is simmering, cook your white beans.  It should take around 2 hours as well. You want the beans to be still a little firm, but easily pierced with a fork. Again, go with the instructions on the package.

 - Add the cooked beans to the chili and bring to a rolling boil.  Reduce heat and simmer for another 15-20 minutes.

 - Serve with rice, sour cream, tortilla chips and some lime wedges for garnish.

 - Yum, yum...eat 'em up!


*I drained and rinsed the tomatoes so that the chili didn't become "too red", but you can leave the sauce in if you prefer. If you do, reduce the amount of chicken broth by half.

Wednesday, December 7, 2011

Ropa Vieja

Ropa Vieja in Spanish means "old clothes", but don't worry...it's much, much tastier than that.  It's a traditional Cuban beef dish with shredded beef, green peppers, onions and tomatoes.  There's a joint nearby that serves a great version, but the best I've ever had was at a Cuban restaurant in Key West called  El Siboney. Here's what their version looks like:


The version I came up with came had a bit more of a tomato base than this one, which was fine.  I also served it with yellow rice and beans, but I also added some pico de gallo and queso fresca.  Came out great!

Ropa Vieja (Old Clothes)

Ingredients
  • 2 lbs flank steak
  • 2 tbsp vegetable oil
  • 1 large onion - sliced thin
  • 2 green bell peppers - seeded and sliced thin
  • 3 cloves garlic - chopped
  • 1 1/2 cups beef broth
  • 1 cup tomato sauce (homemade or otherwise)
  • 6 oz tomato paste
  • 2 tsp ground cumin
  • 2 tbsp white vinegar
  • 2 tbsp fresh cilantro - chopped
 - Heat the vegetable oil in a large skillet over medium heat. Brown the flank steak in the vegetable oil on both sides for about 5 minutes per side.  Remove from heat and set aside.

 - Add the broth, tomato sauce, tomato paste, cumin, vinegar and cilantro into either a slow cooker or a large sauce pot if you plan on cooking it on the stove top. Whisk thoroughly.  Add the beef, onions and peppers and mix.  If you are using a slow cooker set it to low and walk away for 6 hours or so.  If you are cooking it on the stove top, cook it on low with a tight lid for around 4 hours.  Stirring only occasionally

 - Remove the flank steak from the stew, and set aside to cool...say 15 minutes.  Shred the steak with either a couple of forks or your hands. I suggest your hands. How often do we, as adults, get to play with our food like that. Add the shredded beef back to the pot, turn up the flame a bit and heat for 5 minutes or so until it's nice and hot.

 - Serve with warm tortillas, yellow rice, beans (I used kidney beans in a chili sauce), pico de gallo and queso fresca.

I didn't think to take any pictures of it when we had it for dinner, but here's a picture of a plate I put together the next day for lunch.


Friday, November 18, 2011

Thanksgiving Recipes


Hey just checking to see if anyone has any good recipes for Thanksgiving or suggestions for the best way to cook the turkey. I've been hit or miss with the bird over the years. Sometimes it comes out OK, but other times I've had disasters where the white meat is already dry and hitting 175 degrees when the dark meat is still bleeding. I'm up for some new ideas - let's hear it!

Best Cheesesteak in Philly, Really....


This will be a short review. I moved to Philadelphia in 2005 and shortly thereafter had friends visit from northern Jersey and we made a long weekend out of casing and reviewing the usual suspects of Philly Cheesesteak-ness. Pats and Genos on Passyunk, Steves Prince of Steaks in the Northeast, Jims Steaks on South Street. Slacks, Tony Lukes, blah blah blah. Steve's Prince of Steaks is the best among the big name places above. Pat's and Geno's are tourist traps and both BLOW. The rest are middle of the road.

I worked down by the airport in Sharon Hill up until 2008. It turns out the absolute BEST cheesesteak was right around the corner from my office. Leo's Steaks on Chester Pike in Folcroft PA. If you are in the area and are looking to experience a true Philly cheesesteak that the locals go to get - GO THERE. Unlike the more famous places Leo's does not live off of a famous name like Pats or Genos, so they try harder. Massive quantities of top notch thinly shaved rib-eye - not the thick chewy slabs like Genos does nor the cheap "Steak-Um" style stuff at Slacks and some of the others. This is the best. Great rolls too. If you're in the area let me know and I'll take you there myself. End of review.

Thursday, November 17, 2011

Famous Dave's Rib Rub Recommendation


I'm not one to be a shill for name brand products, but if something is truly exceptional I won't hesitate to support it here on the blog. I HIGHLY recommend Famous Dave's Rib Rub.

I have a cabinet literally bursting with dry spices, rubs, blends and mixes; some name brand stuff, some of my own concoctions, and some I get from the Spice Corner in Philadelphia (which is also an excellent place to visit if you're ever in the Italian Market section of the city.) I have tried tons of different dry rubs on pork and beef ribs. I like to experiment. I figure I'm investing a whole day of drinking and sports watching while slow cooking ribs so I want to have some fun tinkering. Whats the fun in having the end result always come out the same after all?

I came across Famous Dave's rib rub last month while down in Topsail Isle on the North Carolina coast. Eight college buddies whom I hadn't seen in 25 years and I had a rental house for the week, so it was a drunken mess, but a LOT of great food was cooked. On the morning of the second day a couple of the guys went out early to pick up supplies for the day, many cases of beer, and a bunch of racks of both pork back and beef ribs. When I asked how they were going to prepare them they were like "well we got this dry rub - Famous Daves - it was all they had at the little market in town." I was bummed out frankly. Famous Daves, for those of you who don't know, is a chain type of rib restaurant. There's a few of them around here in Philly, I've never been to one, but I'd tried their BBQ sauce once off the supermarkt shelf and was not impressed. I did not have high hopes for this rub. I expected it to be about 80 percent salt like most commercial rubs you find in the supermarket. Boy was I wrong! The fellas dispersed a generous amount of the stuff on both the beef and the pork ribs, let it set while the fire was heating up, and four hours later VOILA! Absolutely the best tasting ribs I've ever had - BAR NONE - and that covers a lot of years and a lot of great ribs.

Now all due credit needs to go to both the cook (my buddy Clive who is a good ol' boy NASCAR tailgating master BBQ chef) as well as the great quality of the meats, but the seasoning was remarkably well balanced; a little sweet, just the right amount of spicy, not at all overly salty, hitting all the right "bbq" notes with a hint of something I couldn't define at the time but later found out to be ground cloves. In totality it just worked amazingly well. No gooey BBQ sauce needed with this stuff, just dig right in.

I have since searched it out locally and have gone through two jars already. It's great on ribs, pork chops, and steaks too. In fact the last night in Topsail we treated ourselves to a massive grilled beef rib roast, again with the Famous Daves rub, and it was another "best I've ever had" moment. Like I said I'm not a paid shill nor am I employed by Famous Daves, but I give this stuff my five star recommendation. Give it a try and let me know what you think.

Sandwich Week: Turkey and Sliced Egg. A Variation

"A variation on what?", you might ask.  A variation on the first sandwich I hi-lighted this week.  "Why?", you might also ask.  Because I had a ton of that red cabbage slaw left over and I needed to do something with it.  Here's what happened:

Still using that fine paper china, I see...
Turkey and Sliced Egg Hero

Ingredients
  • Some kind of hero or roll - I used a rosemary/salt baguette
  • Red cabbage slaw - (see recipe)
  • Sliced turkey breast
  • 1 hard-boiled egg - sliced
  • Garlic/butter spread - made from garlic and butter (duh)
  • Gold's HOT horseradish - yeah
OK, here was my thought process on this one. Do something similar, yet different.  So I poked my head in the fridge to see what I could see.  And what I saw was some turkey, some horseradish and a hard-boiled egg.  I could work with that.

The bread is a little different.  A rosemary/salt baquette instead of an olive baguette.  I still toasted it with some butter and garlic just the same though. And I used some of that red cabbage slaw I had made up earlier in the week.  That's the similarities.  The differences are turkey breast instead of roast beef, no shaved Romano cheese, a sliced hard-boiled egg and a smear of spicy horseradish on one side of the hero.

The results? Fan-freakin-tastic!

All the flavors of the slaw came through, as did the garlic rosemary toast and horseradish.  And the addition of the sliced egg was pure genius, if I do say so myself.  What's great about it is that all the secondary flavors from the slaw, horseradish and bread didn't steal from the two main ingredients of turkey and egg.  They just accentuated the flavors nicely.  You might me tempted to sprinkle a little salt on this one, but I didn't because the baguette was a bit salty to start with.  All in all, another great one! 

Tuesday, November 15, 2011

Homemade Gyro Sammiches


Ever since leaving NY in 2005 I've been searching for a decent Gyro down here in the Philly suburbs. The only decent ones are in the actual city itself, which is a bit of a schlep. You can get them from just about any pizza joint locally but they take the meat out of a freezer in little premade slices - not carved from the spit, so in my mind that is NOT a gyro. I came across an Alton Brown recipe that I fiddled with and simplified a bit. It's a little time consuming but the flavors are pretty authentic.


NOTE: I also included my Tzatziki Sauce recipe - make this prior to starting the sandwiches of course.

Gyro Meat:
1 lb ground lamb
1 lb ground beef (recommend high fat content - 80/20)
1 large yellow onion and 4 cloves garlic, pulverized in food processor then drained of liquid.
1 tbsp each of ground oregano, ground rosemary, ground marjoram, kosher salt
1 tsp each of black pepper, ground cumin, ground thyme

Mix all this together in a Kitchenaid mixer and run on high until it becomes tacky and almost paste-like. Don't slack on this step otherwise the consistency will just be like meatloaf, not what we're going for in a gyro. It could take up to ten minutes run time on high to get it just right.

Remove the mixture and mold it into a 9"x6" loaf pan, pressing down to remove as many air pockets as possible.

Heat oven to 325. Place the loaf pan inside of a larger, deeper pan filled about halfway with water (you want the water level equal to the where the meat comes up to in the loaf pan.) Bake in this mock "Bain Marie" for 1 hour. Remove loaf pan from water and let rest for a few minutes. Drain the fat and reserve.

Once cool enough flip the meat out of the loaf pan, slice thinly and fry - using the reserved fat from the baking (which has all the great flavors from the spices in there.) Check a piece for salt level - you may need to add a little more to the meat while frying at this point.

Put on pita bread and top with the usual Gyro goodies; lettuce, tomatoes, slivered onion and Tzatziki sauce. TIP - I find it hard to find really GOOD pita bread in the supermarkets so I use Indian Naan bread from a little Subzi Mandi joint down the block from me - it's awesome. If you have an Indian place local and you have the choice between using that or the Peppridge Farm shit in Pathmark --- ALWAYS opt for Naan bread.

Here's my quick recipe for Tzatziki Sauce:
8 Oz of Greek Yogurt (Fage 4% is the best - don't use lower fat it's sour)
4 Oz sour cream
1 medium cucumber (peeled) and 3 cloves garlic, processed until fairly smooth but not liquified.
Appx. 2 oz (a small handful) of crumbled feta cheese
1 tsp each dried mint and dried dill
1 tsp honey
1 tsp white vinegar
Salt to taste if needed (test for this LATER)

Mix all ingredients and let set in refrigerator at least two hours -- test salt level prior to serving.

Sandwich Week: The BEST Cuban Sandwich

I've mentioned this several times, both here and on my personal blog. But the best Cuban sandwich I've ever had was from a laundromat on White Street in Key West.  Let that sink in for a moment before I repeat it.

The best Cuban sandwich I've ever had was from a laundromat on White Street in Key West. 

This one:

clicken ze biggen
That's the M&M Laundry on White Street, just a few blocks north of Duval Street off of US 1.  And if you click on the picture to make it bigger, you will see a takeout window for Sandy's Cafe, which shares space in the building with the laundromat.

How did this happen? How is this possible? Out of the dozens and dozens of joints where I've tried the Cuban sandwich (marinated roast pork, ham, Swiss cheese, pickles, mustard grilled on Cuban bread), how can a place that operates out of a laundromat make the best one?

Honestly, I have no idea.  But they do.

I've been to Key West a whole bunch of times, and Cuban food is a mainstay down there.  And the Cuban sandwich is offered at probably a hundred different places in town.  And thousands and thousands more in Florida and it is ever-expanding northward.  My local deli in town here on Long Island makes a Cuban Sandwich.  It's decent and it will do in a pinch, but it ain't a Cuban from Sandy's Cafe in Key West.  That's for sure.  I don't have a picture of one that I've ordered myself, but click here to see what the rather plain-looking sandwich, er, looks like.

I guess the most important thing is not how they make the best Cuban sandwich, but simply that they do it.

If you ever find yourself in Key West, take a stroll up US 1 and turn onto White Street for a block or so until you see the M&M Laundry.  You'll know that a great sandwich is yours to have in mere minutes from there.


Monday, November 14, 2011

Sandwich Week: Roast Beef with Red Cabbage Slaw

Hey kids!

Welcome to Day 1 of Sandwich Week here on Simmer, Sip, Share!!!

I know, I know.  You somehow missed that on your calendar, right? Well, I just decided late Sunday night to make it Sandwich Week this week.  A spur of the moment kinda thing, if you will.  I'm going to post once a day about a great sandwich I've made and/or enjoyed.  The rest of you kids who contribute?  Well, I hope you will join in either in the comments or with a post of your own.

Here goes:
_________________________________________________________

Roast Beef with Red Cabbage Slaw

Enjoy the fine paper china


Ingredients

  • Boar's Head Roast Beef - sliced thin
  • Fresh baked olive baguette - around 7-9 inches long
  • Unsalted butter - just a pat or four
  • 1 clove garlic - minced
  • Romano cheese - shaved thin
  • Red cabbage slaw - see recipe below
Here's what you are gonna want to do. Make a garlic butter spread with the, duh, garlic and butter.  Spread it thinly on both sides of the olive baguette you've sliced in half.  You can't get your hands on an olive baguette?  I feel sorry for you.  But feel free to replace with something less tasty, like Italian bread or something.  Now toast that sucker up a nice golden brown in the oven, toaster oven or whatever you have.

Now layer on the red cabbage slaw (recipe below) and let it sit for a while so that the juices from the slaw really sink into the toasted bread.  While that is happening, shave some Romano cheese onto that bad boy.  Doesn't have to be a lot, so use your best judgement here. Cheese is a personal choice, so I would never assume to tell you how much or how little to use.  Uncommon sense is the rule here.

Finish up your sandwich with as much or as little sliced roast beef as you like.  I didn't tell you how much cheese to use, and I certainly won't tell you how much roast beef to use.  Again...it's a personal choice.

Smush it all together and serve with a pickle spear and an ice-cold beer.  I made this on Saturday afternoon, and it was...sublime.  The garlic/olive bread, the roast beef, the shaved romano, the vinegar/oil, celery seed, raisins and red onion from the slaw made an incredibly delicious combination.

I give it the Earl Seal of Approval.  Dig!


Ingredients
  • 1/2 head red cabbage - heavily shredded or thinly sliced (either way)
  • 2 medium carrots - peeled and shredded
  • 1 small red onion - diced
  • 1 cup golden raisins
  • 1/2 cup apple cider vinegar
  • 1/4 cup extra virgin olive oil
  • 2 tsps celery seed
  • 2 tbsps sugar
  • salt and pepper - to taste
Take your vinegar, olive oil, celery seed, sugar and salt and pepper and whisk them up until they are mixed together really nicely.  At least until the salt and sugar dissolve.

In a large salad bowl, mix the shredded red cabbage, carrots, onions and raisins.

Slowly add the vinegar/oil mixture and mix thoroughly.  Cover and refrigerate for a few hours before you intend to serve.  It makes a great side dish, or (as you can tell) a great addition to a tasty sammich.


Friday, November 4, 2011

The best way to eat cereal...

Okay kids, I have for you today, two of the best Rice Krispie Square recipes you will ever have in your life.  I PROMISE!  If you are not 300% satisfied, you can come up here to Canada and tell me to my face!  This is how we do it up here.  I usually only make these once a year as they are DANGEROUS!  So don't say you weren't warned.  They're wicked good.  'Tis the season to start Christmas baking and this is what I'm starting with:


Mars Bar Rice Krispie Squares
4 Mars bars
1/2 cup margarine
3 cups Rice Krispies

- heat the Mars bars and the margarine in a saucepan stirring continuously until melted
- add cereal to coat


Topping:
1 cup semi-sweet chocolate chips
1/4 cup margarine

- combine chips and margarine in saucepan on low heat until melted.
- stir often until smooth (I use a double boiler for this cuz I usually burn the first batch)
- pour over squares
- let cool before cutting


Peanut Butter Rice Krispie Squares
1 cup brown sugar
1 cup corn syrup
1 tsp. vanilla
1 1/2 cup peanut butter
6 cups rice Krispies

- combine brown sugar and corn syrup in a saucepan, boil for 1 minute, take off heat and add vanilla
- stir to combine
- then add peanut butter, stir until smooth.
- stir in Rice Krispies
- pack into a 9x13 greased pan

Topping:
1 1/2 cups chocolate chips
1 1/2 cups butterscotch chips
1-2 Tbs. peanut butter (optional)

- melt chips and peanut butter in a sauce pan over medium heat
- pour over squares
- cool before cutting

Tuesday, October 18, 2011

Chili Request

Got a request for my chili recipe from Becky over on Twitter last week. Or the week before. It was recently, okay?  I mentioned that I include sausage meat in my chili recipe, which she didn't dig on. That's okay. It's easily replaced and I've offered several options below.  Sorry, no pictures for this one. I haven't made it in a while, so you'll just have to make do with the recipe by its lonesome.

Band-Aid Chili


First off, the recipe below is bullshit. Every time my father made this chili and every time I have made it since, it has come out differently. Different veggies, more or less meat, more or less spice. It all comes out to a different chili. So the recipe below is pretty much a guideline more than anything else. The last time I made this chili it had 8 different kinds of peppers, for example. And more meat to veggie ratio. And black beans. I hardly ever use beans, but I used them that time. So take the recipe with a grain of salt. Or a pinch of cumin. Whatever you prefer.

Secondly, it's called Band-Aid Chili because my father...well, maybe you don't want to hear that story. It's kinda disgusting. - Earl

Ingredients
1 ½ pounds ground sirloin
1 pound ground Italian sausage (sweet or hot or both)*
1 large can peeled Italian tomatoes (not sure of the size, but the big can)
1 small can tomato paste (not sure of the size, but the smallest one)
1 bottle beer (user’s choice, but make sure you save some for the cook)
2-3 red, orange or yellow peppers diced (I like to mix it up for the colors)
2 green peppers diced
2 large onions diced
6 celery stalks diced
I large handful of jalapeno or similarly spicy peppers seeded and diced.
2 ½ tablespoons ground chili powder
1 tablespoon ground cayenne pepper powder
1 tablespoon ground cumin
1 tablespoon salt

*For those how you who don't like sausage meat, you can use ground pork or veal. Or maybe some shredded beef from a pot roast. Anything really. Just something to give the chili some different flavors. Use your creativity here.

- Add tomatoes (you can slice them up if you like, but include all the juice in the can), tomato paste, beer and spices to large pot on low-medium heat.

- Brown beef and sausage in large pan. Drain and add to pot.

- Sauté onions, celery and peppers in a little vegetable oil until onions are a little translucent. Add to pot.

- Bring to a slow boil and reduce heat to low. Simmer for 4-5 hours (or until the tomatoes break down) covered, stirring occasionally.

- Serve with sour cream, grated cheddar or Monterey Jack cheese, tortilla chips and hot sauce for an additional kick. It doesn't need to be served over rice, but if that's what you are into then I'm not gonna stop ya.

Enjoy!

Monday, October 3, 2011

Corn, Bacon and Potato Chowder

Autumn rolled in like a son of a bitch a couple of days ago.  Rain, temperatures in the 50's and all around gloom. The kind of days that can sink you into a mild depression. Especially when you contemplate the impending Winter months when it gets really cold out there.  It's time to replace the sandals with boots. The t-shirts for sweaters. The shorts for...non-shorts.  You know.

In other words, it's time for soup!

Corn, Bacon and Potato Chowder

This is another incredibly simple meal. And I say "meal" because it came out more like a stew than a chowder or soup.  I had found a recipe that called for some diced ham, but I had just cooked up a pound of Benton's Bacon the other day specifically to use in recipes.  And Benton's is so smoky and delicious that you don't need very much at all to give the chowder the smokiness it deserves.  I used small new potatoes diced up rough leaving the skin on (after a thorough scrubbing). I hate peeling potatoes, so that worked for me. Finished it all up with a dollop of crumbled goat cheese on top to give it a bit of tang. I'm always up for a bit of tang.

It fucking rocked!  One of the best soups I've ever made, or so says Gia.  Smoky, fresh, filling, hot and tangy.  All good things.

Crappy, fuzzy picture from my phone
 Ingredients
  • 1/4-1/2 lb thick-cut bacon - cooked and chopped 
  • 1 small onion - chopped
  • 3-4 celery stalks - chopped
  • 1 1/2 lbs chicken breasts/tenderloins
  • 4 cups chicken broth
  • 2 lbs potatoes - cleaned and cubed
  • 2 1/2 cups corn - I used frozen niblets
  • 2 1/2 cups skim milk
  • 1 tsp dried thyme
  • 4-5 tbsps flour - for thickening
  • salt and pepper to taste
  • crumbled goat cheese - optional garnish

1. Add the bacon, onion, celery, chicken and broth to a large stock pot and bring to a rolling boil.

2. Reduce heat with the lid slightly ajar and simmer for around 20 minutes or until the chicken is thoroughly cooked. Remove chicken and set aside.

3. Add the potatoes, corn, milk, thyme and any salt and pepper you want to use and return the heat to a rolling boil.

3. Reduce heat and simmer until the potatoes are just on the firm side of tender.

4. Roughly chop up the cooked chicken into small chunks and add back to the soup.  Thicken with the flour sprinkled in one tablespoon at a time until you get it how you like it.

5. Return to a gentle simmer for 5 minutes or so, and then serve piping-hot. Add a dollop of crumbled goat cheese if you wish.  But it tastes great either way.

Enjoy!


Wednesday, September 21, 2011

Old is New

Don't ya just love it when a seemingly defunct or tired restaurant in your neighborhood gets a clean overhaul and actually IMPROVES on the previous establishment?  Me too.  That's what happened this past weekend at Old Fields in Greenlawn, NY.  Just minutes up the road from our home.

source: NY Times
The joint near the railroad tracks in Greenlawn used to be called the Old Fields Inn.  The new owners, local restauranteurs David and Christine Tunney, trimmed the name a bit and really cleaned up the place that has been a mainstay in our neighborhood for over 50 years.  And pretty much everybody used to say the same thing about the place.  Great marinated steak...and not much else.

Well, they've kept the great marinated steak and done an overhaul on the menu that is one of the finest pub-food restaurants I've seen in a long while. 

We started out at the bar for cocktails. Hendricks gin martinis straight up with 3 olives.  Gia's dry, mine not so much.  I like to taste a little vermouth in my martini.  They were both excellent.  I can't stress enough how important it is to have tasty olives (or onions or whatever) in the martini.  A bad batch of olives can ruin an otherwise hard to screw up cocktail.  I tend to judge a joint on how well they make a martini. Old Fields passed with flying colors.

Then we moved to a booth in the bar room near the fireplace.  Very rustic and cozy.  We each started out with a salad.  A cucumber and tomato salad made with fresh lemon and extra virgin olive oil for Gia, and a nice Caesar salad for me.  I tend to judge a joint on how well they make a Caesar salad.  Old Fields passed with flying colors.

For entrees, Gia went with the marinated strip steak served with creamed spinach and a twice-baked potato.  I went with one of the specials for the evening.  A Guinness stew with big chunks of pot roast and root vegetables, served with crusty bread.  It was really, really good.  I tend to judge...aw, you know the drill.

We topped it off with some strawberry shortcake for dessert.  I'm not a fan, but I tasted it and it was fresh as all hell.  Very nicely done.

One of the things I'm dying to try on the menu the next time I go back is a big burger served between two grilled cheese sandwiches.  Oh yeah!  That, my friends, is comfort food.

I guess my point is, sometimes you can be more than pleasantly surprised by trying a local joint that you had previously overlooked.  I doubt any of you will get to Greenlawn, NY anytime soon. But if you do, Old Fields is a great options for an excellent meal.

Wednesday, September 14, 2011

Stuffed Peppers

I found this recipe here - a new favourite blog of mine.  Maybe it's just the heritage that's close to home.  I've been meaning to make this for a while now but every time I pull out the ingredients and re-read the recipe I end up too strapped for time - it's a bit time consuming if you do it all from scratch, but very worth it.  And since fall seems to be upon us here in Saskatchewan, and I'm on a week of holidays, a nice hot casserole type meal was just the thing for yesterday's supper!  It is very similar to a cabbage roll, the same filling just stuffed in a pepper instead - and way easier than fooling around with cabbage leaves!  I served it with creamy mashed potatoes and steamed carrots with a honey ginger glaze!


Ingredients:1 lb lean ground beef  (I used ground bison, and I'm thinking you could also do it with ground chicken or turkey)
1 tsp salt
1/2 tsp pepper
1/2 grated onion
1/2 cup sour cream (I used light sour cream and it didn't seem to have an adverse affect)
1 cup cooked rice (1/3 cup raw)
5 large peppers, cut in half or 10 small 
I also added a clove of minced garlic.  After tasting I also decided that hot pepper flakes should be added the next time I make this.

Sauce:1/2 onion, chopped
1/2 pepper, chopped (I just used the left over tops and bottoms I cut to make the pepper sit flat)
5 Tbsp flour
4 cups chicken or vegetable broth
1/2 small can tomato paste
salt and pepper to taste  

And if you're short on time or just don't care to go to the extra work of making a sauce of scratch a can of tomato soup would work just fine.  I made the sauce from scratch (I usually do) and it was worth it - nice fresh flavours!

Method:
1. If you do not have leftover rice, cook about 1/3 cup rice in 2/3 cup water and a bit of salt, until done.
2. Spray medium sized roaster with cooking spray.
3. Prepare peppers. If peppers are large, simply cut in half and remove stems and seeds. Shave off the pointed/top part so that they sit better. If using small peppers, cut the pointed section off, remove seeds and stem. Arrange in roaster, flat sides down.
4. In a large bowl, mix ground beef, seasoning, onion, sour cream and cooked rice. This works best by hand.
5. Fill Peppers.
6. In large skillet, cook chopped onion and pepper until soft.
7. Add half of the broth. Mix flour and the rest of the broth in a sealed jar and add to sauce.
8. Stir in tomato paste, salt and pepper to taste. Stir sauce until it comes to a boil and thickens.
9. Pour over filled peppers and bake at 350F for 75 -90 minutes.

Tuesday, September 13, 2011

Grilled eggplant with tomatoes and mint

I've gotten to a certain comfort level in the kitchen lately.  And that has to do with seeing a recipe that I like, or having had a meal that I liked, and then kinda figuring out how to do it myself without having to follow a recipe for it.  There are pluses and minuses to that kind of system.  The pluses have to do with with working within that comfort level. The minuses sometimes add up to a final product that is clearly not what the recipe intended.  Which sometimes turns into a plus.  Huh?

photo credit: Smitten Kitchen

From the wonderful folks at Smitten Kitchen, here's a recipe for a bruschetta-style dish that most folks would consider a funky appetizer.  I saw it and immediately thought it would make a nice dinner for Gia, since she is a huge fan of eggplant grilled on the barbecue.  And she is trying to eat healthier, so I thought some eggplant "steaks" topped with this fresh mix seemed appropriate.

So I tucked it away in my memory banks for the next time I did a grocery shopping.

Then I made it tonight.  I didn't re-glance at the recipe, so I had some things off.  I added some diced kalamata olives instead of capers.  Okay. And I also added a diced cucumber that had been peeled and seeded.  And some diced green peppers.  But that's about it.  The rest of it was pretty loyal to the extremely simple recipe.  Fresh and funky.  If you dig eggplant, you may want to give it a go.  Gia loved it, and that's all that mattered to me.

By the way, I don't dig eggplant.  But I had some of the tomato/mint/feta mix as a side salad.  To a great big patty melt.  Because that's how I roll.  Oh yeah!

Thursday, September 8, 2011

Leftover Soup

I'm a huge fan of leftover soup. Not actual soup leftover from a previous meal. No. I mean soup made from leftovers. It's a great way to make a simple soup, and a great way to use those leftovers that you worked so hard to not eat from an earlier meal.

Case in point.

On Wednesday night, I made a dinner of Thai food for the two of us.  Larb (Laab), which is a Thai meat (beef, pork or chicken) salad, and some aromatic rice served in romaine lettuce wraps.  If you are interested, my recipe for it is right here

I love Larb, but even while I'm eating it freshly prepared I'm thinking about the soup I'm going to make with the leftovers for lunch the following day.  Which is exactly what I did today.  Here's what I came up:

Fuzzy picture taken with my phone

Leftover Larb(Laab) Soup - super easy

Ingredients
  • 1 cup beef broth/stock
  • 1/2 tsp garlic chili sauce - like this one
  • 1 tsp lime juice - freshly squeezed
  • 3-6 tbsp leftover Larb (recipe)
  • 3-6 tbsp leftover rice - any cooked rice will do.
Just through all the ingredients above into a pot and heat them all up until you got a nice simmer going.  I'm a little vague up there with the portions for the leftover Larb and rice.  I like a lot of stuff in my soup, so I tend toward the larger portions.  But if you want it more broth-like, then feel free to use less. It's the greatest combination of salt from the broth and fish sauce, tang from the lime and spice from the garlic chili sauce.  The leftover Larb will have marinated overnight, so the mint really shines through as well.

It's my favorite soup, and the true beauty of it is that it only takes about 5 minutes to prepare.

Friday, August 26, 2011

Tropical (Storm) Skittles

Remember that recipe I posted a while back for the Catdaddy Orangina?  Sure you do.

Well, in honor of Hurricane Irene, I tweaked it a little bit to the following:
  • 2 oz Catdaddy Carolina Moonshine
  • 1 oz Bacardi Razz (Raspberry flavored rum)
  • 1 oz Orange Juice
Serve over ice and fill with 2-3 oz of Mandarin Orange seltzer.

It tastes...like Skittles.  Not the crunchy coating, but the soft candy inside.  Kinda like Starburst.  It's crazy delicious! 

Wednesday, August 24, 2011

Restaurant Review: The Tattooed Moose, Charleston SC

I was down in Charleston again this past weekend.  And no trip to Charleston is complete, for me, without a visit to one of my favorite bar/restaurants, the Tattooed Moose.

Source
We usually go right from the airport directly to the Moose.  It's the first and last place that I want to eat when I arrive.  It's a roadhouse-style bar grub kinda joint.  But Oh-What-Grand-Grub it is!  And the service and staff are top-notch.  A bunch of pierced, friendly tattooed freakies.  My kinda folk.  The music is great too!  While we were sitting down for brunch on Sunday, we enjoyed a selection of great 60's Motown, funk and soul. But it ain't always like that.  Psycho-billy, punk, folk, country and whatever gets played here.  Plus, they often have live music at night on the weekends.

One of the things they are most known for is their Duck Club sandwich.  Duck confit, apple-smoked bacon, smoked cheddar, garlic aioli, lettuce, tomato, red onion on three pieces of sweet Hawaiian bread.  The menu states that it has been said to be the greatest sandwich of all time, and I'm not one to disagree.  We first heard about this joint on talk radio on XM, and we just knew we had to try it.  If you ever get down to Charleston, you have to try this sandwich.  It might change your life.

Oh, and duck is something that they take seriously at the Moose.  The make a hash with it for breakfast/brunch.  It's crazy good.  They even fry their french fries in duck fat.  Seriously! Sooo good.

This past Sunday, I had the Low-Country Cuban sandwich with a side of cilantro/lime cole slaw.  Just to try something different. Their Cuban had roast pork, ham, swiss, brown mustard and these awesome pickled green tomatoes on a pressed buttered roll.  A little twist from a traditional Cuban*, but a delicious twist.  The cilantro/lime slaw was just...sublime.  Just the right amount of red onion and vinaigrette.  Gia went with the smoked chicken salad BLT.  I had a bite, and I hate to admit this, but it's better than my own chicken salad.  Which is great! She also tried the gazpacho, which was really, really good.  Especially on a hot afternoon.

Choked it all down with some PBR pounders (for me), some spicy Bloody Marys (for her) and some Jim Beam on the rocks (me again!).  All in all, a perfect Sunday afternoon.  We weren't quite done yet.  We still had to hit downtown Charleston to visit the Bar at Husk, but that's a post for another day.

If you are ever in Charleston or surrounding areas, make the trip to the Tattooed Moose.  Especially if you like great sandwiches, great fries, great beer, cheap beer, good people, bourbon and fun.  It comes with the highest Earl Seal of Approval.


*By the way, the best Cuban sandwich in the world is at a takeout joint in a laundromat on White Street in Key West.  Seriously.  I don't know the name of the joint, but if you are ever down there have someone point your way toward it.  You won't be sorry.

Monday, August 15, 2011

Grillin' time, bacon-wrapped asparagus

The sane portion of the grilling season is so short up here in the frozen north that once I'm safely able to huddle around the 'que without my parka, I do everything I can on the grill. Moving past hot dogs and hamburgers, the grill really allows you to bring some great flavours to the table with almost no effort. Okay, so great ingredients do a lot of the heavy pulling here, and if I haven't convinced you yet, remember every item on the grill is one less pot or pan to scrub:

Take some asparagus -
DSC05333

Wrap in bacon. Don't follow my lead here, add toothpicks to hold the bacon, much easier to manage -
DSC05345
(I swear to you I once saw advice to add salt and oil to the asparagus before wrapping it. Clearly the writer was not familiar with bacon.)

Go to your favourite butcher and grab some seasoned chicken kebabs, then grill them -
DSC05342

Once one side is cooked, throw the asparagus on the grill, at the lowest possible flame (or have your fire extinguishers ready) -
DSC05346

Add some crusty bread, a couple of cold salads and you've got a perfect meal for beautiful summer evening -
DSC05350

Let's not limit the 'queing to the main course - how about S'mores for dessert? (Graham cracker, marshmallow and chocolate for those not familiar) -
DSC05352

We've since discovered that high heat, and omitting the top cracker while cooking will produce the oo-iest, goo-iest results -
DSC05359

Prep time for asparagus: 10 minutes
Cooking time for asparagus: 8 minutes

Prep time for s'mores: 3 minutes
Cooking time for s'mores: 3 minutes

You can usually find Coreen blathering on over here. Feel free to stop by and say, 'hey'.

Friday, August 12, 2011

Here's a tip about Jim Beam Rye


Spoke with my soon to be ex personal trainer about which booze is best while trying to loose weight. He gave whiskey and vodka the big stink eye. "Rye is ok", he said. Thus- I brought home some yumminess up there.

Then, I had a really busy day serving humanity and couldn't make it out for lunch. THEN I thought to myself, well, I have extra Weight Watchers Points, why not skip dinner and have a cocktail? So I had myself two helpings.

That's not a good idea.

So, I've decided that Jim Beam Rye needs to be paired with something. It's a strong, rye bread tasting liquor. It's not meant to be flied solo.

Any suggestions?


For more Mrs. Hall, click here

Thursday, August 4, 2011

Tomato Sauce Redux

I thought I already posted this one over at my own joint, but I can't seem to find it.  Anyway, I figured it's worth another look-see.  And since Alex Belth over at Bronx Banter Blog thought the same thing...well, birds of a feather. 

Tomatoes, butter and an onion.  That's it.  Simplicity itself.  I literally make this sauce once a week.  I love it so much, I want to take it out behind the Middle School and get it pregnant!

And Kristen Miglore on Food52 re-hashes the famous recipe, this time using fresh tomatoes that she peels herself instead of the canned San Marzano kind.  Either way...delish!  So follow that link or click the pic below for the super simple and super delicious recipe.  And enjoy!

Photo Credit: food52.com

Wednesday, August 3, 2011

The Famous Newsday Clam Casserole


Hi everyone, I'm Fugs and I'm a cooking addict. (Altogether - "Hi Fugs!")

Ok blow me. Just kidding.

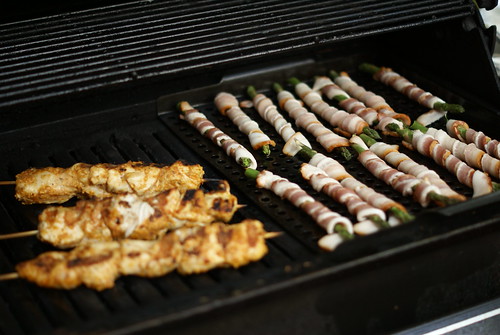
So I'm going to do a blog about ribs this weekend, but I wanted to get my feet wet with this site. I'm going to post a recipe that is near and dear to me, as it is one that my mom made a staple in her kitchen during the 70's and 80's. It is the classic "Newsday Clam Casserole."

My passion for cooking comes directly from my Mom, and for me it wasn't just about good food, but about the social universe that was her kitchen. She owned the joint, and it was a comforting thing to know that fact as a young lad. This was where mom should and would always be, you know? It seemed somehow easier to sleep at night as a child with that image dancing in my garlicy little head. While some women rebelled against this notion during that time that was not at all my mom - again, she owned it. If you knew what it was like to steal a meatball out of the saucepot on a Sunday afternoon when your mom "wasn't looking" then you know what I'm saying.

I want and try to recreate that feeling in my own family kitchen every day. My wife can't boil an egg, so I am the family cook - but I don't complain. Even though I'm Dad and work full time, cut the grass, take out the garbage, fix what's broken and do all that other dad stuff, when it comes to the kitchen (like my mom,) I OWN it. I want my kids to feel those same good feelings and the communal groovyness of gathering at the table for a well done meal, made with a lot of love,...and alcohol. But let's be honest, those feelings of nostalgia wouldn't mean shite if the food weren't good, right??

Mom got this recipe out of Newsday in like 1974, thus the name, The Newsday Clam Casserole. The little weekly recipe gig was next to Ann Lander's column on about page B-16 for those who grew up on LI like me. I use canned clams here, but if you are a shi shi snotty kind of person, or have incredible amounts of disposable income and time you can buy about 4 dozen cherrystones, shuck 'em, mince 'em, reserve the liquid, and then hit yourself in the head with a mallet because you won't taste a damn bit of difference.

Here goes.

The Newsday Clam Casserole


Ingredients:

4 slices of Bacon, cooked crisp and broken up into small pieces

4 cans minced clams, Drained; with juice reserved, get some bottled clam juice if needed too.

1 large yellow onion – diced fine

8 tablespoons Olive Oil

2 Bay leaves

4 cloves garlic, sliced thinly

1 Tbsp dry Oregano

1 tsp Garlic Powder (or to taste – I like more)

Fresh squeezed lemon juice – about 1/4 of a lemon

1/2 tsp Kosher Salt (or to taste)

1/2 tsp black pepper

1 to 2 cups of Plain Bread Crumbs

Dash of Tabasco or to taste

Dash cayenne pepper or to taste

Butter for greasing baking pan

Appx. ½ cup of grated hard Italian Cheese (Parmesan or Romano) in all

Lemon Wedges and Fresh Parsley fronds for Garnish


Directions:


1. Preheat oven to 375 degrees. In a large pan, Cook bacon crisp, break into small pieces and reserve – drain most of the bacon grease – leave a tablespoon or so in the pan.


2. Sauté diced onion in reserved bacon grease with Olive Oil added. When onion is translucent add dry spices (Oregano, Salt, Peppers, Bay Leaves, Garlic Powder,) Continue to sauté over medium heat for 5 minutes or so, then add fresh garlic and sauté another 5 minutes until Garlic is softened.


3. Add clams to mixture and cook until clams are heated – maybe 5 minutes, stirring occasionally, then add most of the reserved clam juice (save a little for the later – see stage 4, below), lemon juice, and Tabasco. Raise heat, stirring and continuing to cook another 3-5 minutes or so until mixture is mildly boiling.


4. Begin to add bread crumbs to mixture, a little at a time, until mixture resembles coarse oatmeal. If it gets too dry add a little more clam juice or water – if it is too wet add more bread crumbs – use your judgment. Turn off heat once you have desired consistency and add about ¼ cup of grated Parmesan or Romano cheese. Add bacon last. Taste the mixture at this point and adjust seasonings – it should NOT be too salty (it will get saltier with the added cheese and absorbing the liquid while cooking.) In case you're drinking heavily don't forget to remove the bay leaves at some point.


5. Grease a Medium Casserole or Pie Dish with butter. Pour Clam mixture in and top with the rest of the grated Parmesan or Romano Cheese. Bake for 35 minutes or until top is golden brown and mixture is bubbly – raise temperature to 425 degrees for an additional 5-10 minutes, or until the edges crisp up a little if needed.


6. Remove from oven and let set for at least 15 minutes. It is too hot and mushy when it comes out of the oven to serve - don’t forget this step! Serve slices with lemon wedges and fresh parsley frond for garnish.


You can also use this recipe to make baked clams in shells (real ones or foil ones) to serve as appetizers – or topped with a little melted Monterrey Jack cheese for “Clams Casino” Again, you can use fresh chopped clams too but will need some bottled clam juice to make up for the liquid required. I don't find it's worth it, canned are fine for this kind of thing.

Tuesday, August 2, 2011

Just checking in


Hey Mike and anyone else on the blog -- I'm just checking to see if this works for me. Please let me know if you can read it.

Also I'm playing around with the images - here's some homemade Andouille I stuffed and smoked a couple months ago.


Again - let me know if you can see this.


Thanks!

Fugs

Monday, August 1, 2011

Chili Burgers

This is a re-hash of something I posted on The Verdant Dude last summer.  But since I made them again this weekend for my family, and I made them exactly this way...I figured what the hell.  The new food blog could use a good burger recipe.  And this, my friends, is one fabulous freakin' burger.

The idea of the "chili ingredients inside the burger" actually came from a Rachel Ray cookbook that my Mom has.  Yeah...don't judge me.  But I give it my own twist and make it into a Juicy Lucy.  What's a Juicy Lucy?  Read on, readers....read on.

______________________________________________________

Earl's Semi-Famous Chili Burgers (Juicy Lucy-style)

  • 2 lbs ground beef - I use 80/20 so that it's extra juicy.
  • 1 medium-sized onion - finely diced
  • 2 or 3 large green chilis - seeded and finely diced
  • 4 or 5 jalepeno peppers - seeded and finely diced
  • 4 tbsp tomato paste
  • 1 tsp chili powder
  • 1 tsp ground cumin
  • 1 tsp sea salt
  • 1/2 tsp ground cayenne pepper
Now you can really add or subtract whatever spices you like here.  You dig on oregeno?  Add some of that stuff!  You don't dig on cumin?  Don't add any of that stuff! It's your burger.  Do with it what you will.  The above recipe will make 8 quarter pound burgers or you can put on your man-boots and make 'em the way I make 'em.  How is that?  Well, lemme tell ya!

First off, I like to prepare this the day before I eat them.  The spices mix with the meat in the fridge over night and make for a more delicious meal. And we are all about the more delicious meal.  But you don't have to.  This last time I made them I did it all right then and there, and they still tasted great.

Dice up your onion, jalapenos and your green chilis and saute them with some olive oil if you like.  Butter if you prefer.  Cook them up for a few minutes until the onions are nice and translucent.  Then set them aside until they cool to room temperature.  Be sure to drain the excess oil and liquid first.  Drain them really well.  You don't want your burger to be a liquidy mess, do you?

After the veggies have cooled, you are gonna need a big mixing bowl. Dump the ground meat, the veggies, the...well all the ingredients into it and start mixing. Use a big wooden spoon if you like, but you're eventually gonna have to get your hands dirty so why not start now? Hmmm? Get in there and make sure all the ingredients are folded in with the meat. The tomato paste will bind the burger together very nicely.

Once it all looks uniform and yummy, you can start making your burger patties. I like to take about a quarter pound of the meat mixture and make it into a large flat patty. But these aren't your normal quarter pound burgers, no? Because now we are gonna kick it up a notch. You see, we are gonna stick a slice of cheese on top of that raw patty. Cheddar, American, Monty Jack, whatever. Then you are gonna take another quarter pound patty and make a cheese sandwich outta that sucker. That's right...a slice of cheese INSIDE the burger. Intrigued? I am.

Now you've got a giant half pound burger that is all ready for the grill. Make sure you pinch the circumference of the burger so that it becomes all one patty. Making each half of the burger thin is key so that the burger cooks uniformly. A few minutes on one side, flip it carefully, then a few more minutes on the other side. Whatever temperature you normally prefer for a burger. What do I have to teach you how too cook a burger the way you like it now?

When done right you get a juicy, cheesy, spicy, delicious burger that is unlike anything that you have ever had before. So juicy that it doesn't need ketchup or mayo or mustard or whatever the hell you normally put on a burger. But feel free to fly that freak flag that you own. I topped my with another slice of cheese (hehe), some sliced green pickled tomatoes and some normal red ones.

The result was glorious!  Just be warned.  You may need a nap soon after finishing one of these bad boys.

Enjoy!

PS - The only sad part of this post is that I didn't take any pictures of the glorious burgers I made on Sunday.  We were too busy cramming them into our faces!  Sorry...won't happen again.  Or will it?

"A Thousand Pardons, I Was Most Revolting..."

Now, I don't want to be the party pooper, but I thought before we get this blog rolling at a steady clip, we best take a moment to review some of the basic rules of food and dining etiquette. At great personal expense(you're welcome) I hired a well known Canadian Etiquette Maven, Lady Fishbourne, to put together a little refresher film for us...So, y'all just take a seat(no feet on the furniture), crack open a Miller High Life tall Boy,and give 'er a watch, y'hear?


Sunday, July 31, 2011

Porch Climbers

Recently re-named "bowl huggers" for obvious reasons...

Your summer just won't be complete without trying this punch!

Equipment required:
  • large punch bowl or pitcher or serving device of this nature
  • several friends willing and able to consume copious amounts of alcohol (don't try this alone!)

Ingredients/Directions:
One can frozen concentrated pink lemonade, empty into punch bowl, then using the pink lemonade can as a measuring device, measure one can of vodka, one can of whiskey (Crown Royal for example), and one beer into the punch bowl.

Mix with ice, serve and climb the porch!

Saturday, July 30, 2011

Mrs. Hall Recommends

Welcome to Mrs. Hall Recommends; where I share what to eat, drink and enjoy. Let's begin with Basil Hayden's bourbon whiskey.

I'm a big believer that women should never ask for wine coolers or weak drinks. It takes practice though. If you only drink fruity drinks, I suggest starting with Captain Morgan and diet coke. It's nice transition to booze like Basil Hayden's.

To drink this, fill a glass with ice. Pour. Take a minute for the alcohol to chill. This will take the bark out of the bite. Then, sip. At first, it may be a bit jarring or rough on the palate. Power through this. After a few sips, everything comes together. Your mouth goes a bit numb, yet the taste buds remain intact.

Just a side note: I don't suggest drinking this at a barbecue or other social gathering. This is the good stuff. It's meant to be experienced. Not gobbled while you chat about your pedicure. I drink this after the kids have gone to bed, when Mr. Hall and I are alone. We lounge on the leather couch, watching a movie. Shoulder to shoulder, hip to hip, holding hands.

Then, after a while, things start to change. At least for me. The booze soaks in, permeating my perceptions. My vertical hold becomes a bit fuzzy. My worries are hushed and my frenetic, forward motion is slowed. I don't fight this, I let it all happen.

At this point, the taste really starts to come through. The experience is almost complete. As I roll it around in my mouth; the golden spices linger, coating the inside. The bite is all gone now, nothing but warm nuzzles.

Somewhere around this point, I realize my toes are a bit numb. That's when I stop.

Take care everyone and happy drinking to you!

For more Mrs. Hall, read her blog here.

Friday, July 29, 2011

Hard Boiled

I'm the kind of guy who buys a dozen eggs and winds up throwing out six of them after a couple of weeks of them sitting in my fridge.  I just don't cook eggs or cook with eggs often enough to go through a fresh dozen in the proper time.

But I bought a dozen eggs a few days ago because I was making this tomato/roasted red pepper stew that calls for an egg poached in the middle of it.  Delicious...I've posted it on my regular blog, but I'll post it here again sometime soon.  Anyway, after a few servings of that, I still had 8 eggs left over that I needed to do something with.

Tonight, I decided to make some tuna salad.  And, occasionally, I like to add a hard-boiled egg or two.  So I figured this was a good opportunity to cook all the remaining eggs and leave the rest for some egg salad or something in the future.  But I've always...ALWAYS...had a tough time with the peeling of the cooked eggs.  I read about all the secrets and tried them all, but none ever worked perfectly.  Most of the time was like peeling an orange with half the rind coming off or half the fruit coming with it, instead of a freshly peeled and perfect egg.

Well, no more.

Tonight I watched this video on Youtube...and it changed my world.  Check it.


I didn't use the baking soda because I didn't have any, but all 8 eggs came out perfectly. Almost TOO perfectly. It was both awesome and kinda weird.

Dig it. I'll never try to peel an egg without the blowing technique again! Ahem.

Monday, July 25, 2011

Catdaddy Orangina

Since I've been talking about it non-stop on my not-so-personal blog and on Twitter, I figure it would be a good jump-into-the-fray point for this here food and drink blog.  So here it is.

The Catdaddy Orangina

Ingredients:
3 oz Catdaddy Carolina Moonshine
1/2 oz OJ
Ice to taste
Seltzer (soda water) to taste

  • Fill yer favorite glass with the moonshine and the OJ.  If you can't find any Catdaddy in your local liquor store, feel free to substitute with any "White Dog" whiskey.  What's that you say?  It's basically a watered down version of the booze that is used to eventually make bourbon, or rye or what-have-you.  White whiskey, corn whiskey, moonshine...it's called a lot of things.  
  • Now fill the glass with some ice. Use as much as you like.
  • Now fill what's left of the glass with seltzer.
That's it.  What you will have will be a cool and crisp summer drink that has soooo much more character than a screwdriver ever did.  Why?  Because whiskey is better than vodka. Period.

Oh, and be sure to drink it with your rubber ducky.  At sunset.  It's just better that way.

Quack!

Greetings and Salutations

Since I haven't been blogging much lately, I decided that the best way to remedy that was to start ANOTHER blog. Silly wabbit.

Actually, I've been planning this blog for quite a while now.  I even wrote about it on The Verdant Dude several months ago, but I've been too lazy to get it going.  Now is the time. Simmer, Sip, Share is the place.  What's with the name? Nothing really.  I just wanted it encompass everything that I hope will be written about on this site. Cooking, eating, drinking and sharing those gastronomical delights with the rest of the Blogosphere.

So expect food recipes, drink recipes, restaurant and bar reviews and really anything at all that any of the contributors would like to share that has to do with food or drink.

What's that you say? Contributors? Hell, yes! I don't plan on doing this all by myself.  So I've sent invites out to some folks who expressed some interest in joining this collaboration.  For that's what cooking, eating and drinking is to me.  A collaboration amongst friends and family.

So add us to your feed reader, tell your friends, chat us up on Facebook or Twitter or whatever social media platform is your particular brand of whiskey.  And join us as we simmer, sip and share our experiences with you.

And if anyone out there would like to join in, let me know here in the comments.  I'll send you out an invite to join our merry band of funsters pronto.

It should be a fun ride.